• Skip to primary navigation
  • Skip to main content
  • Skip to primary sidebar
Happy Family Blog logo
  • About
    • Newsletter
    • Contact Me
    • Collaborate
    • Resource Page
    • Press
  • Recipes
  • LIfestyle
  • Travel
  • Shop
    • My Favorite Products
    • Make Money Working with Brands
  • Nav Social Menu

    • Facebook
    • Instagram
    • Pinterest
    • Twitter
menu icon
go to homepage
subscribe
search icon
Homepage link
  • About
    • Newsletter
    • Contact Me
    • Collaborate
    • Resource Page
    • Press
  • Recipes
  • LIfestyle
  • Travel
  • Shop
    • My Favorite Products
    • Make Money Working with Brands
    • Facebook
    • Instagram
    • Pinterest
    • Twitter
  • ×

    Home » Parties » Holidays » Fall » Halloween

    Mickey Mouse Pumpkin

    Oct 28, 2015 · 6 Comments

    4 shares
    • Share
    • Tweet

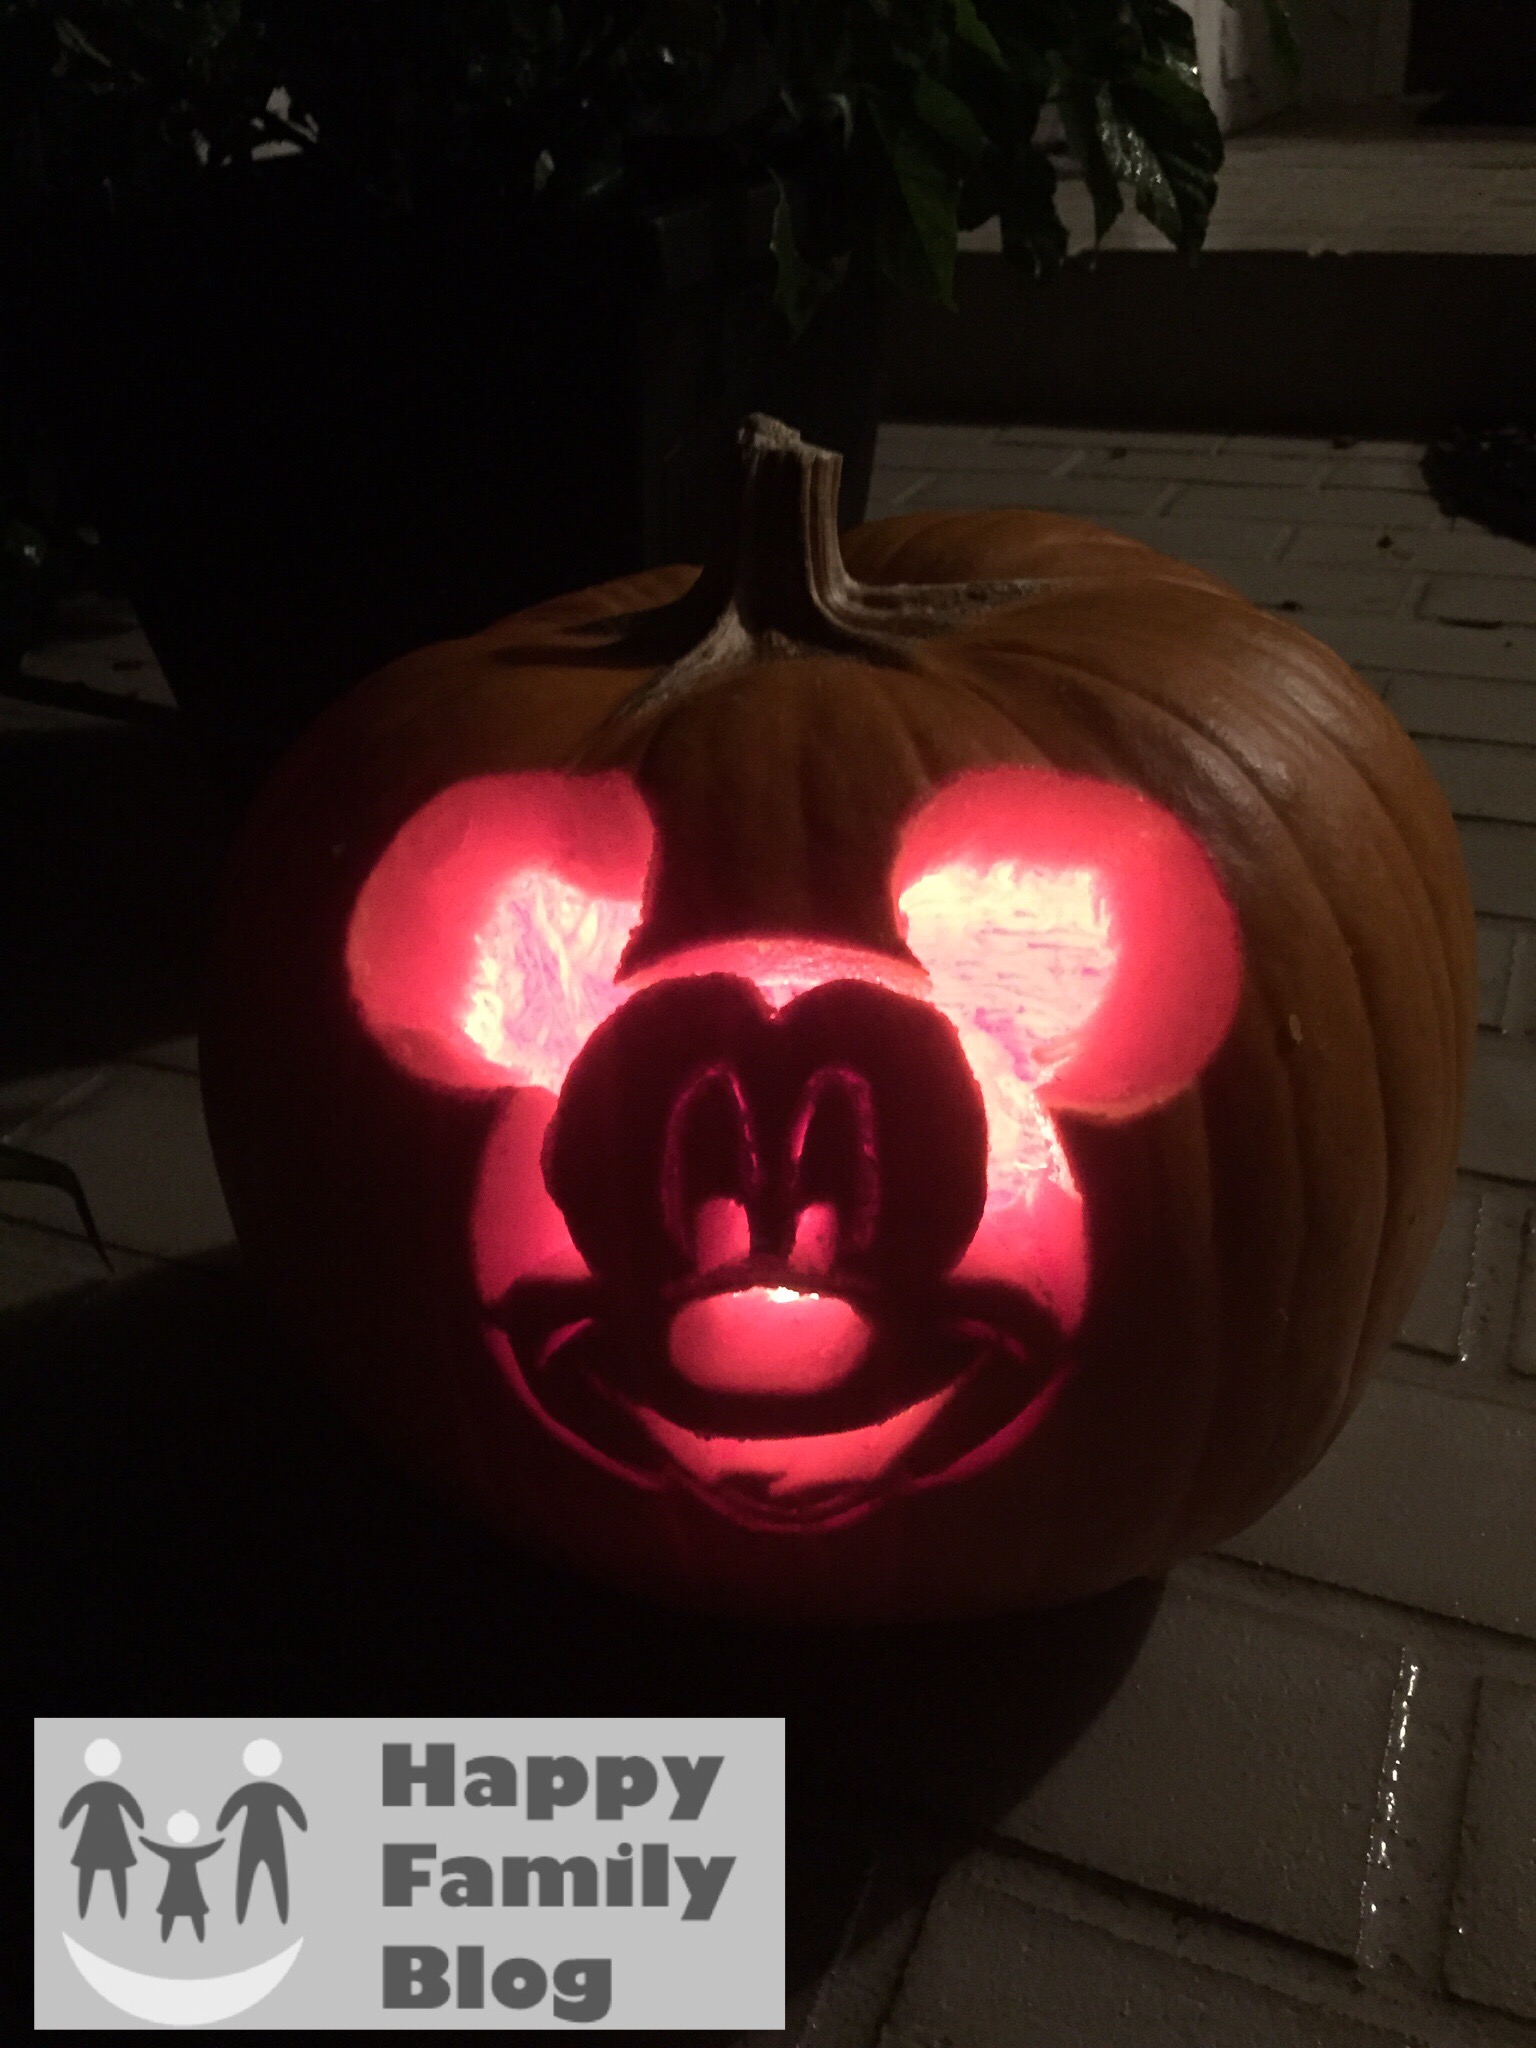
    Learn to carve a Mickey Mouse Pumpkin using a Mickey Mouse Pumpkin Stencil.  Mickey Mouse Pumpkin carving is easier than you think. How cute is this Mickey Pumpkin?

    Mickey Mouse Pumpkin

    Mickey Mouse Pumpkin, Mickey Mouse Pumpkin Stencil, Mickey Mouse Pumpkin carving, Mickey Pumpkin

    Tonight we carved our first ever family pumpkin from one of the Best Pumpkin Patches in South Florida.  Carving a pumpkin with a toddler was a scary thought and I knew I wanted to keep the tools simple and not use large carving tools for the design.

    We wanted to keep B into the project so we let her select the design.  It is no surprise it is was a Disney character.  Mickey Mouse is always a good idea.  Disney had a great template for a Mickey Mouse Pumpkin Stencil.

    Supplies for Mickey Mouse Pumpkin

    • Pumpkin
    • Printer to print the template
    • Tape
    • Spoon
    • Knife
    • Thumb tack

    Instructions for Mickey Mouse Pumpkin

    1 - Print the template.

    2 - Cut a hole in the bottom of the pumpkin.  I know most people cut the top off but after reading a bunch of blogs we tried cutting the bottom and it worked well.   Mickey Mouse Pumpkin, Mickey Mouse Pumpkin Stencil, Mickey Mouse Pumpkin carving, Mickey Pumpkin
    Mickey Mouse Pumpkin, Mickey Mouse Pumpkin Stencil, Mickey Mouse Pumpkin carving, Mickey Pumpkin 
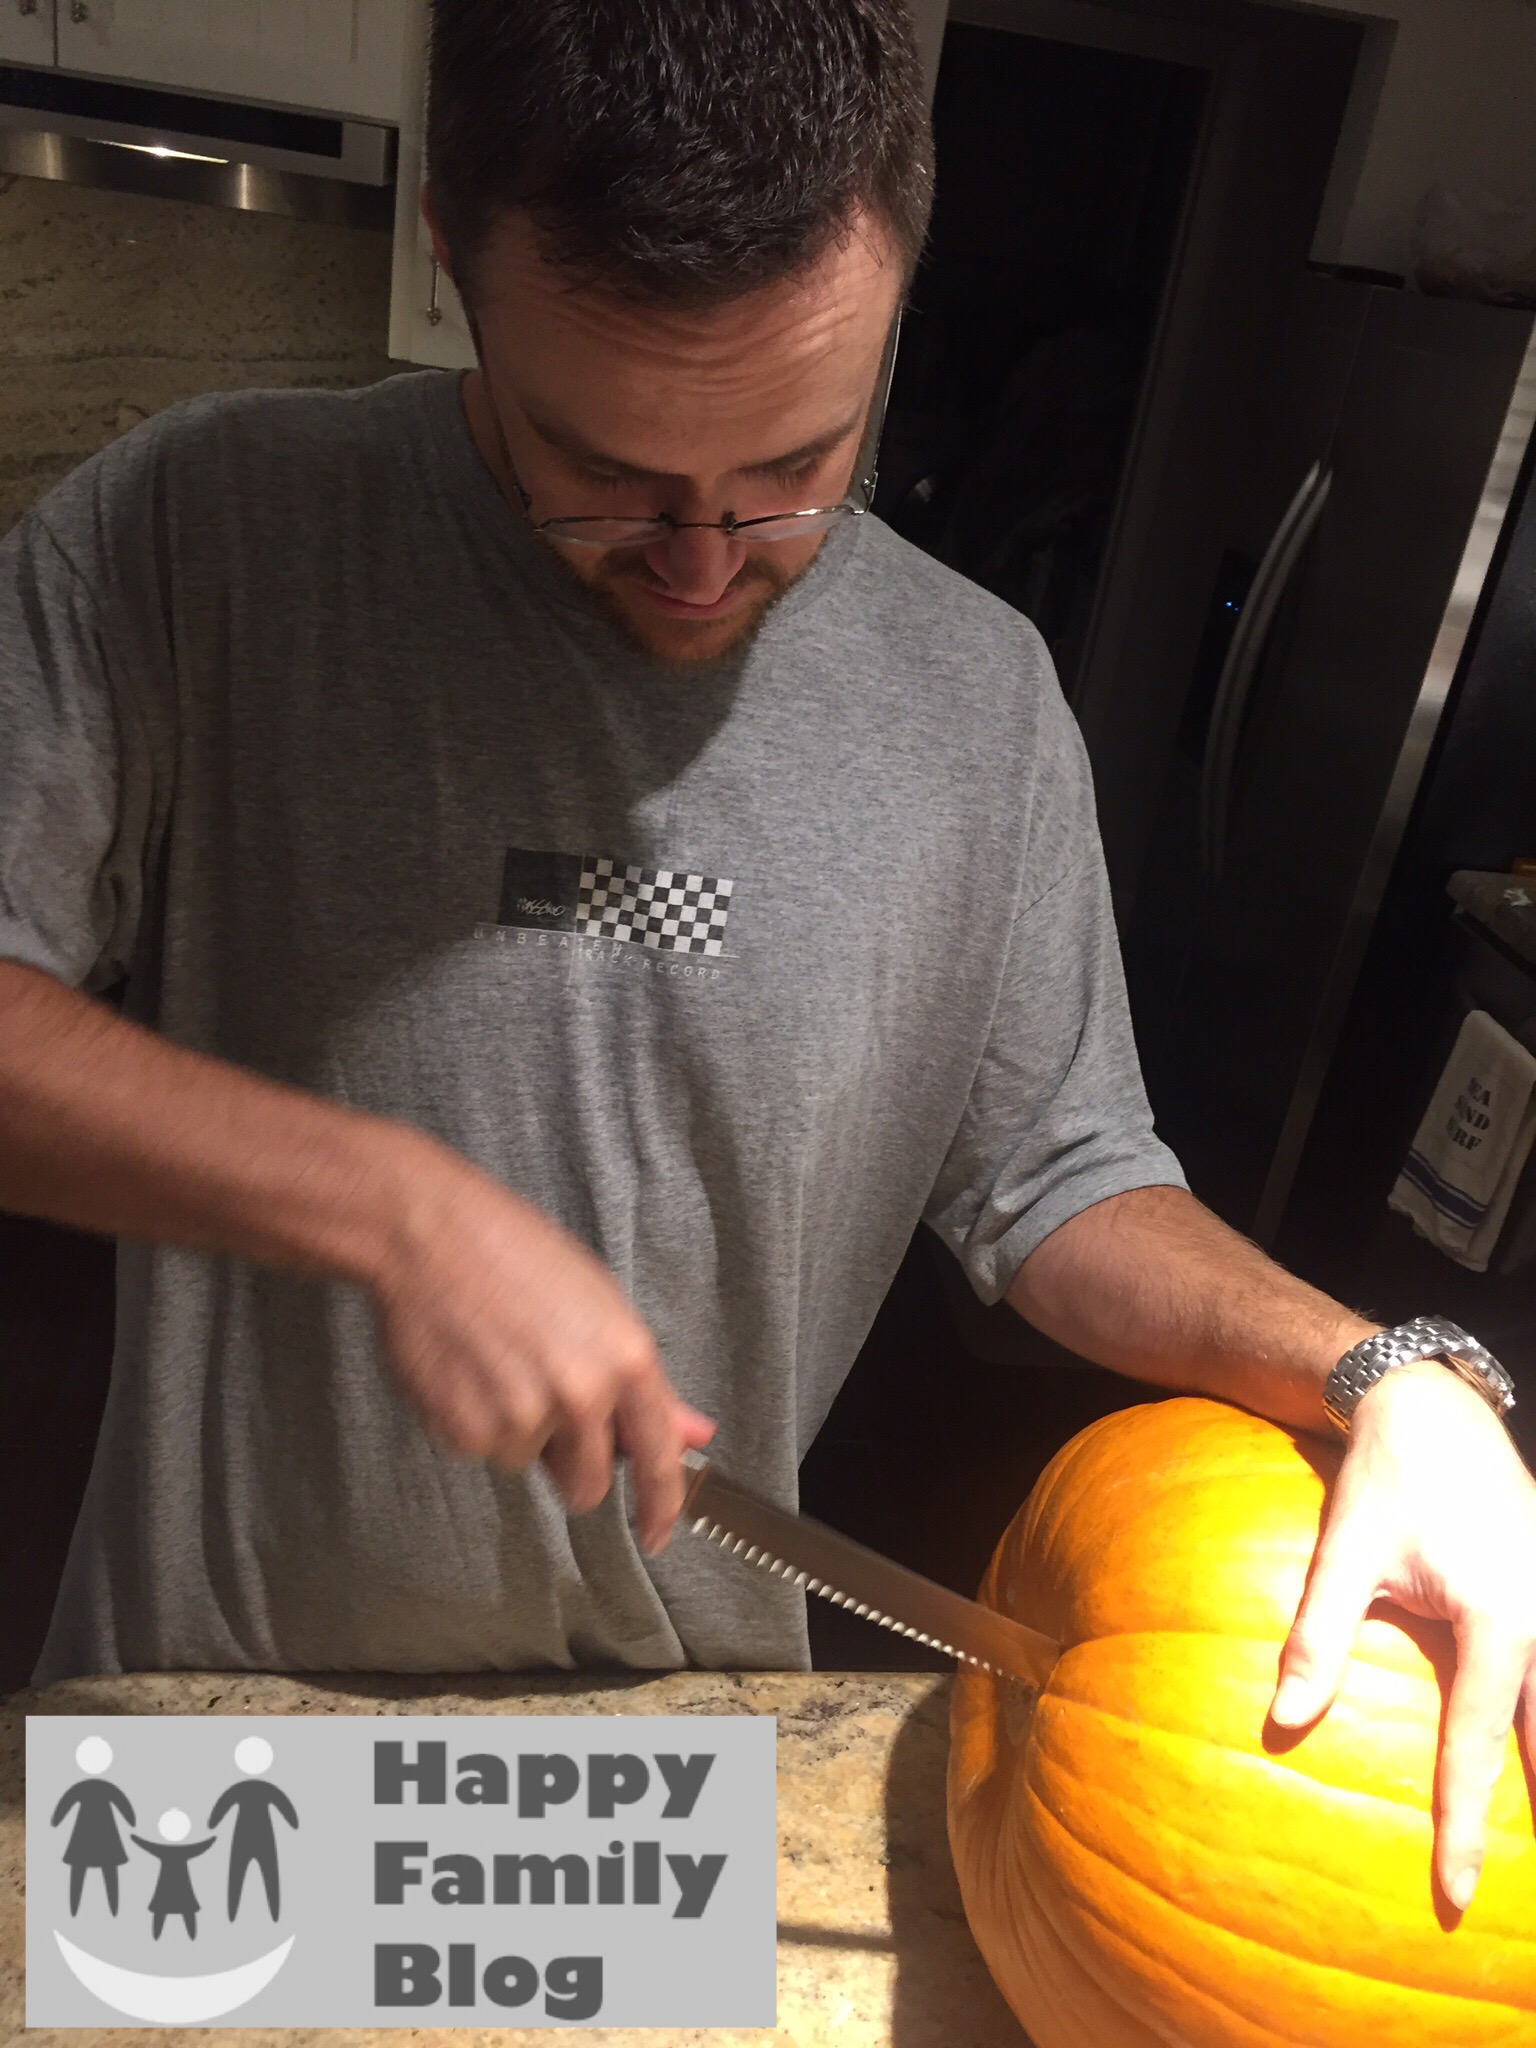
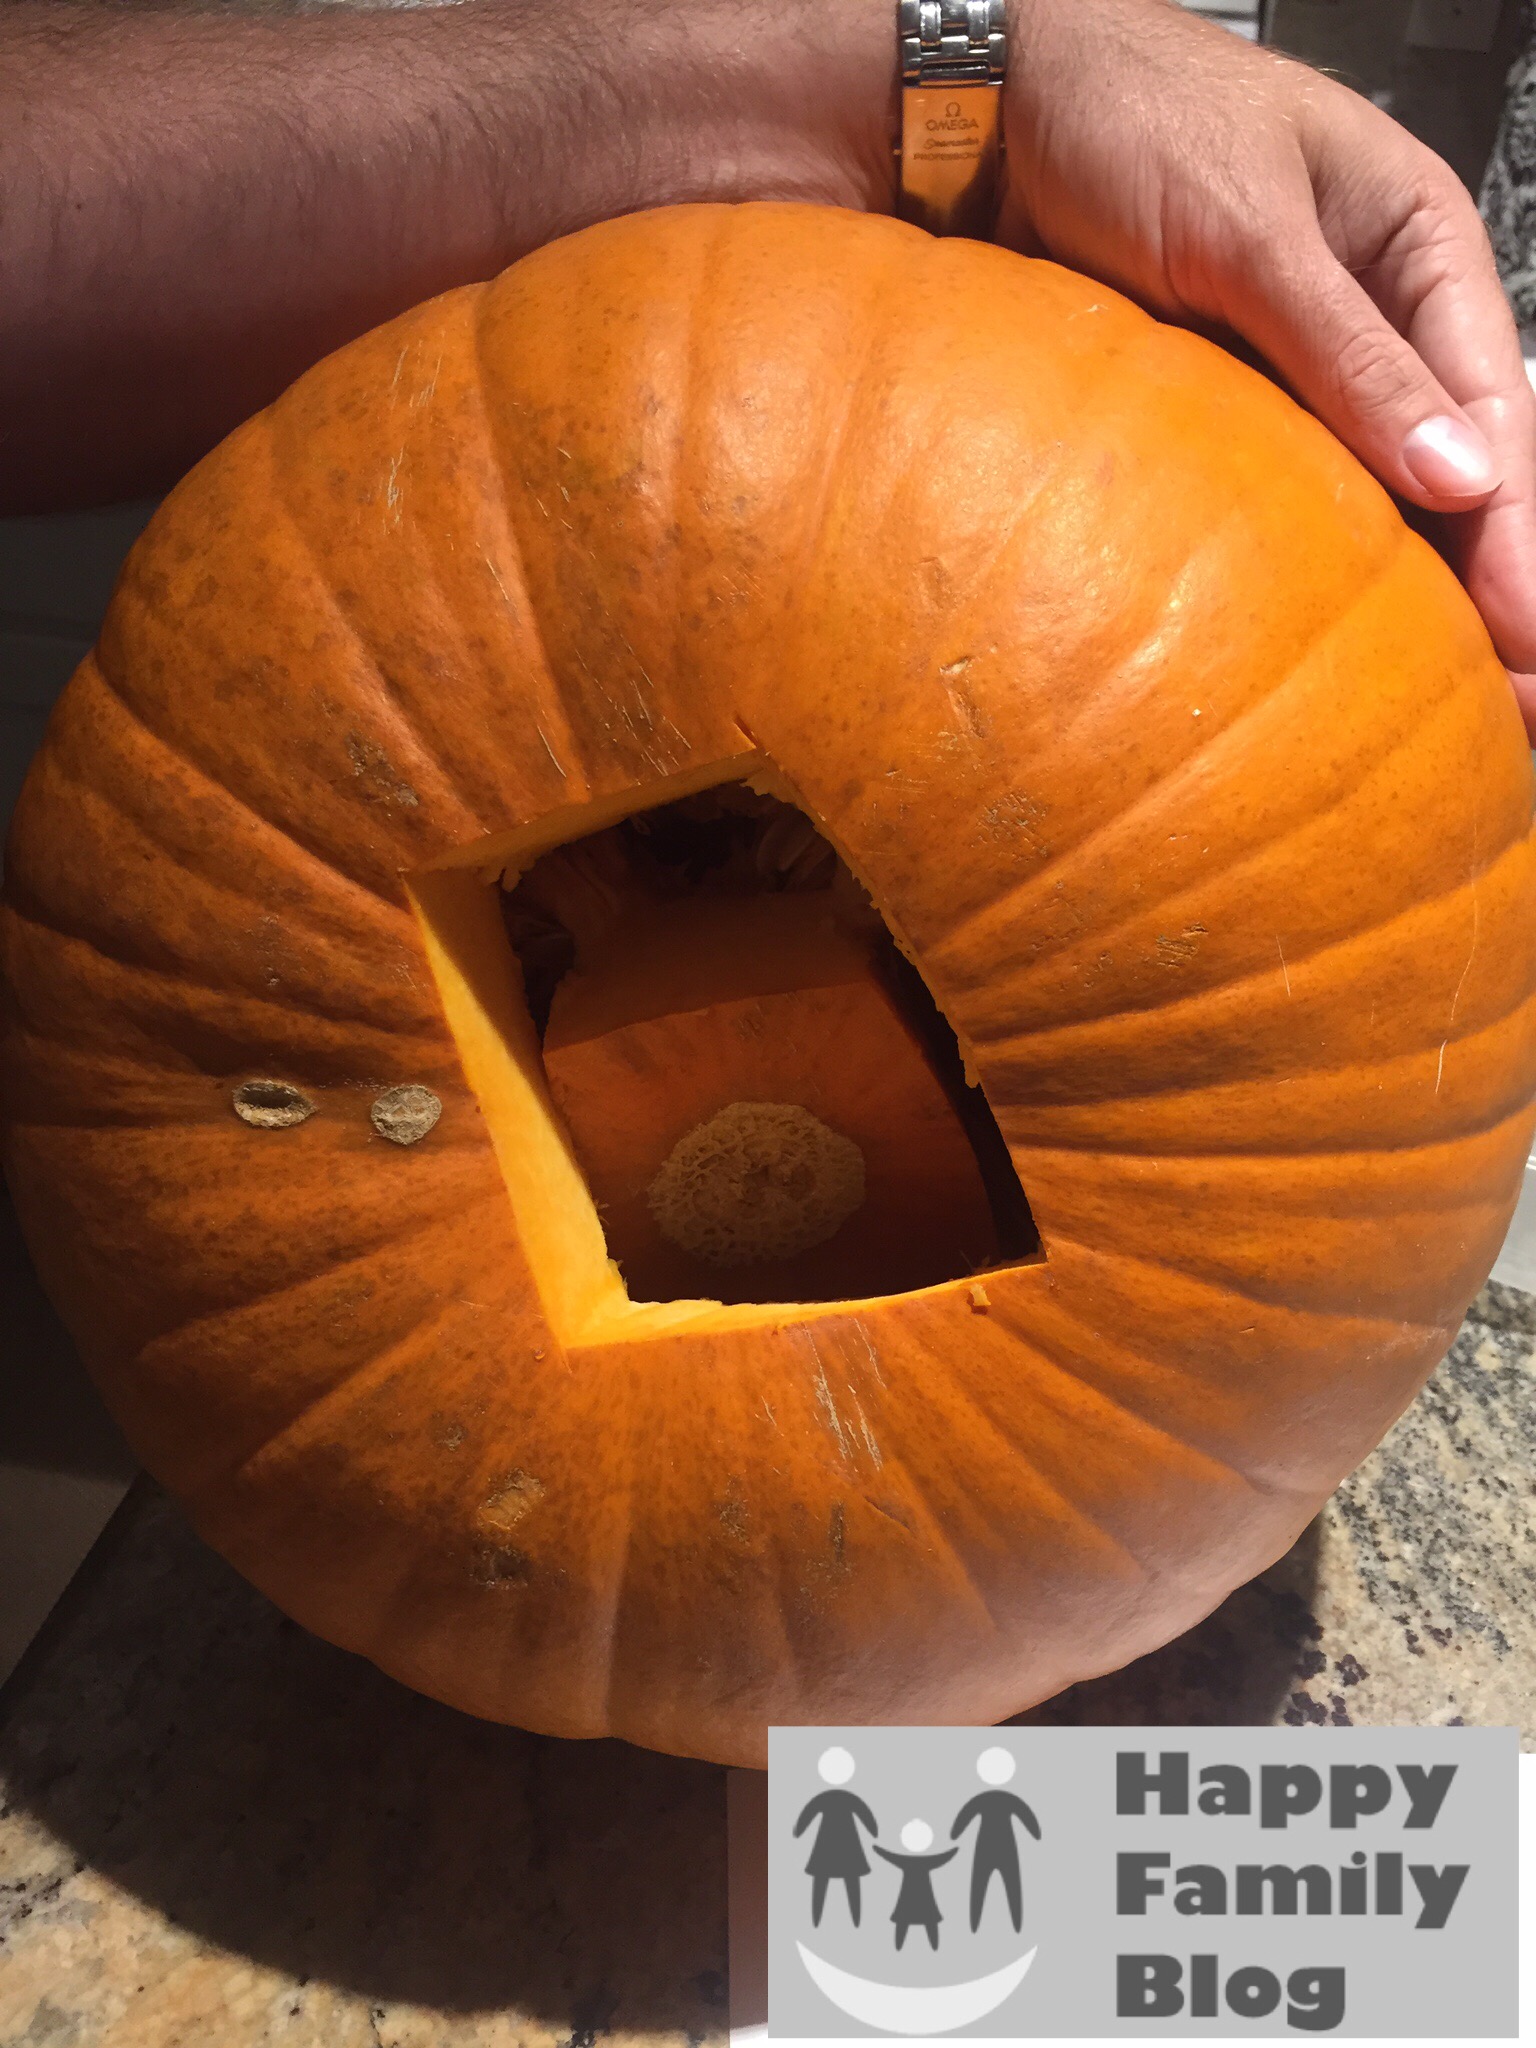
3 - Clean out the inside.  We separated the guts and the seeds for cooking tomorrow.  Mickey Mouse Pumpkin, Mickey Mouse Pumpkin Stencil, Mickey Mouse Pumpkin carving, Mickey Pumpkin
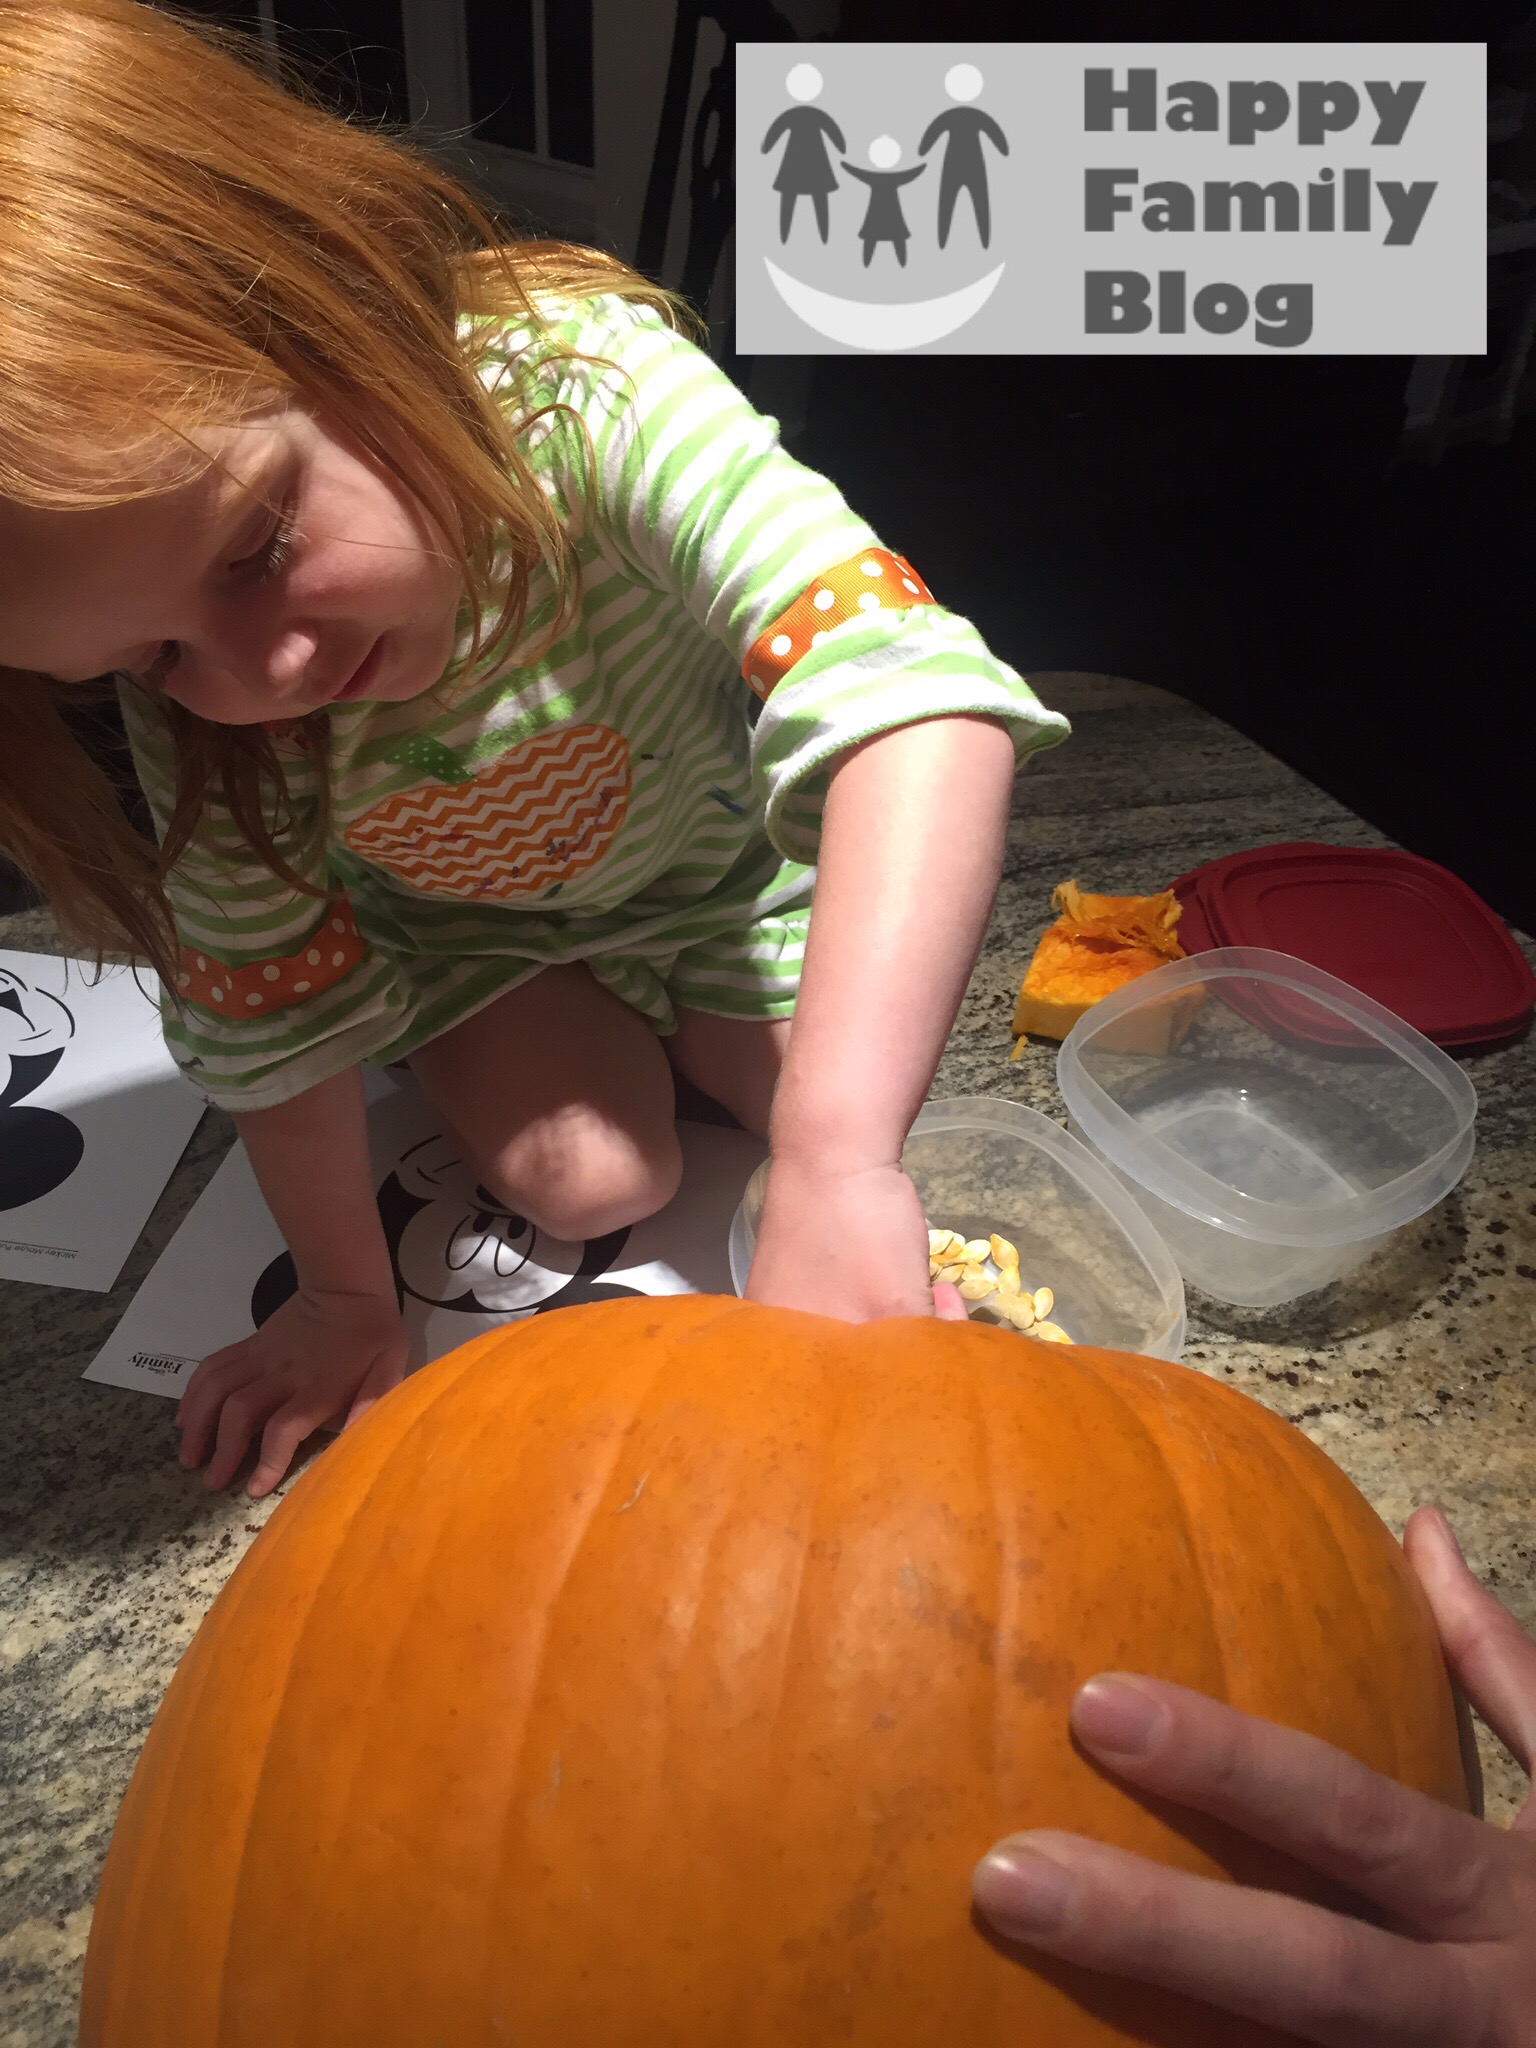
    4 - Cut out the template and tape it to  the pumpkin.  Using a thumb tack make small holes around the black areas in the template.

    Mickey Mouse Pumpkin, Mickey Mouse Pumpkin Stencil, Mickey Mouse Pumpkin carving, Mickey Pumpkin
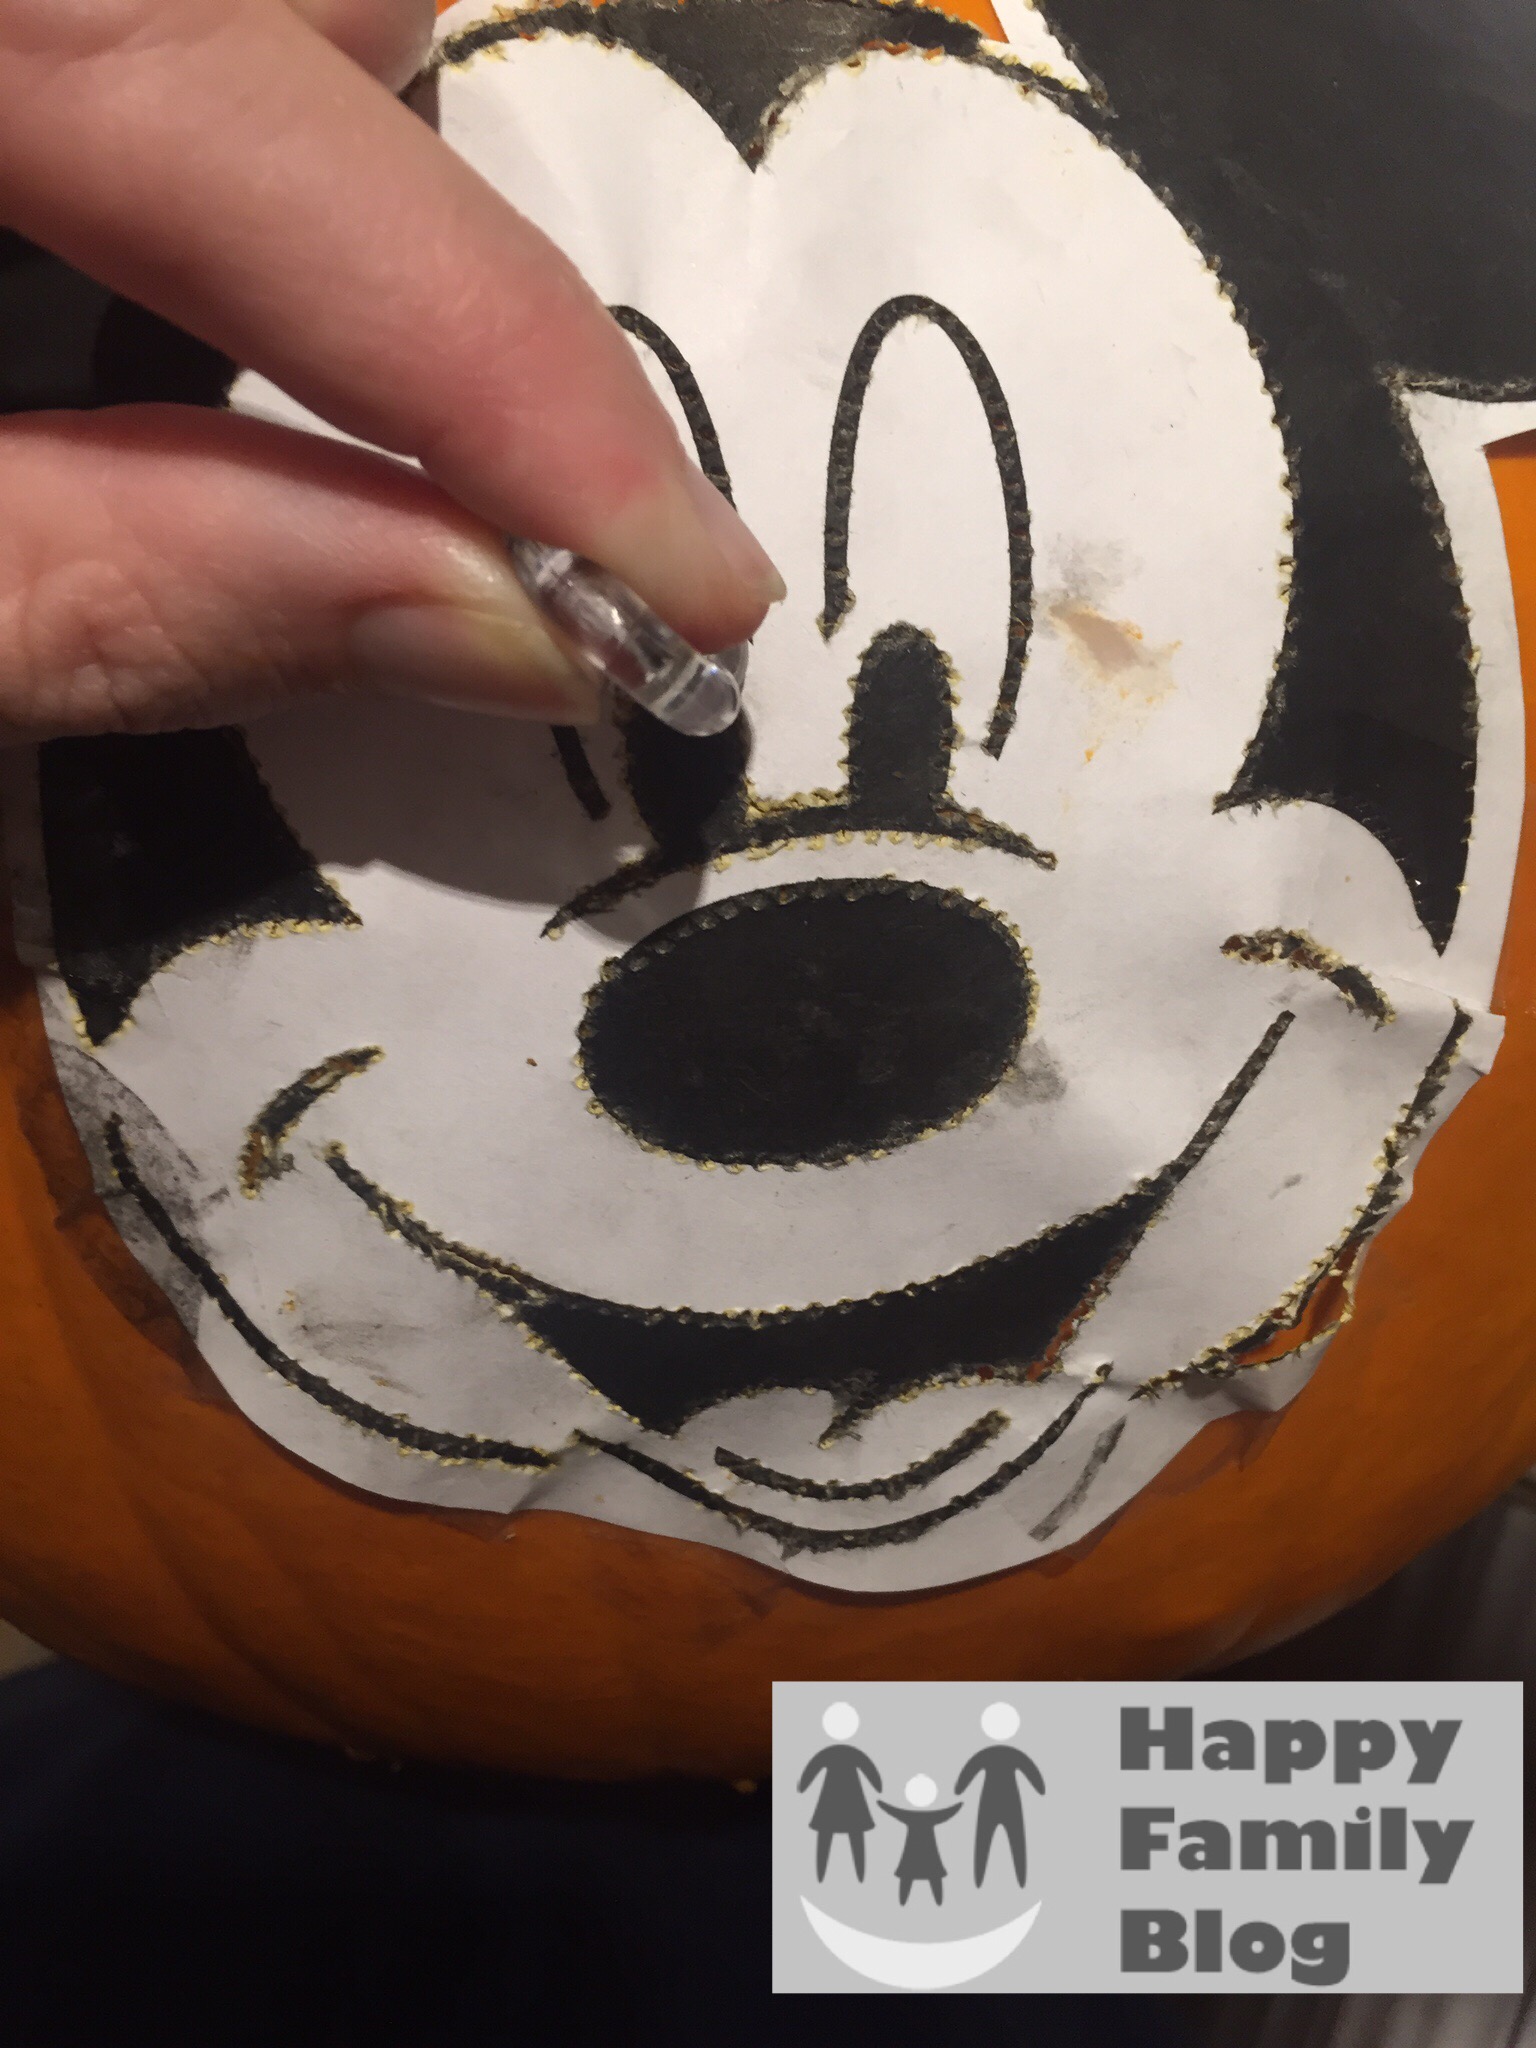
    5 - After outlining all black areas remove the template from the pumpkin.

    Mickey Mouse Pumpkin, Mickey Mouse Pumpkin Stencil, Mickey Mouse Pumpkin carving, Mickey Pumpkin 6 - Using a small knife cut along the dots.  Mickey Mouse Pumpkin, Mickey Mouse Pumpkin Stencil, Mickey Mouse Pumpkin carving, Mickey Pumpkin
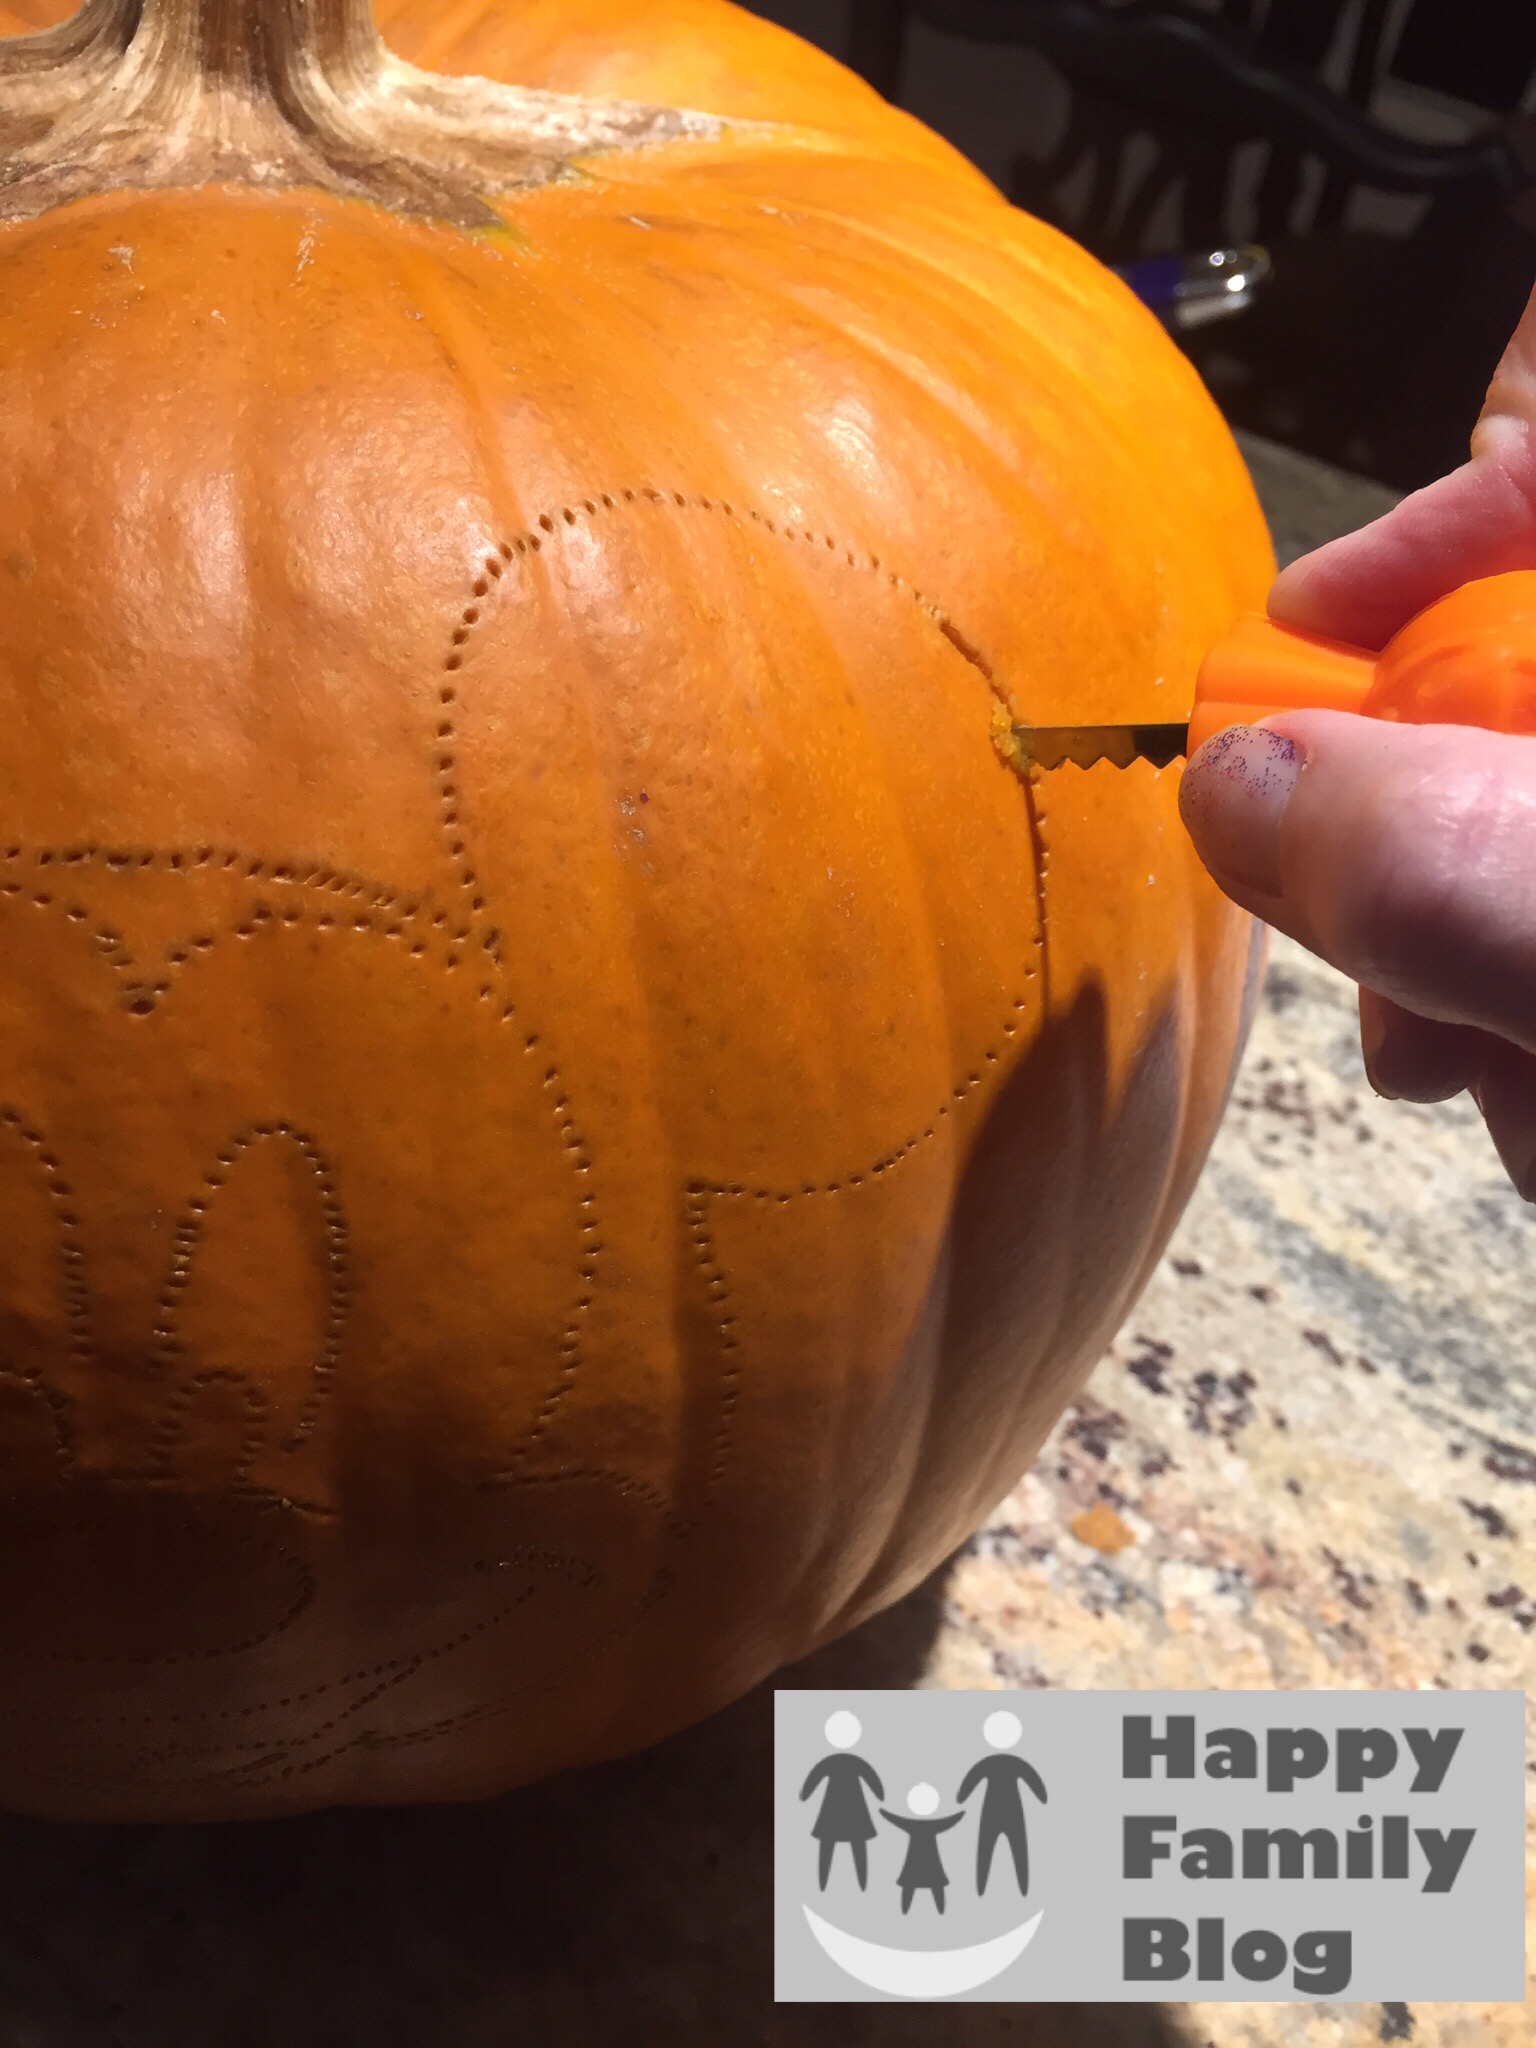
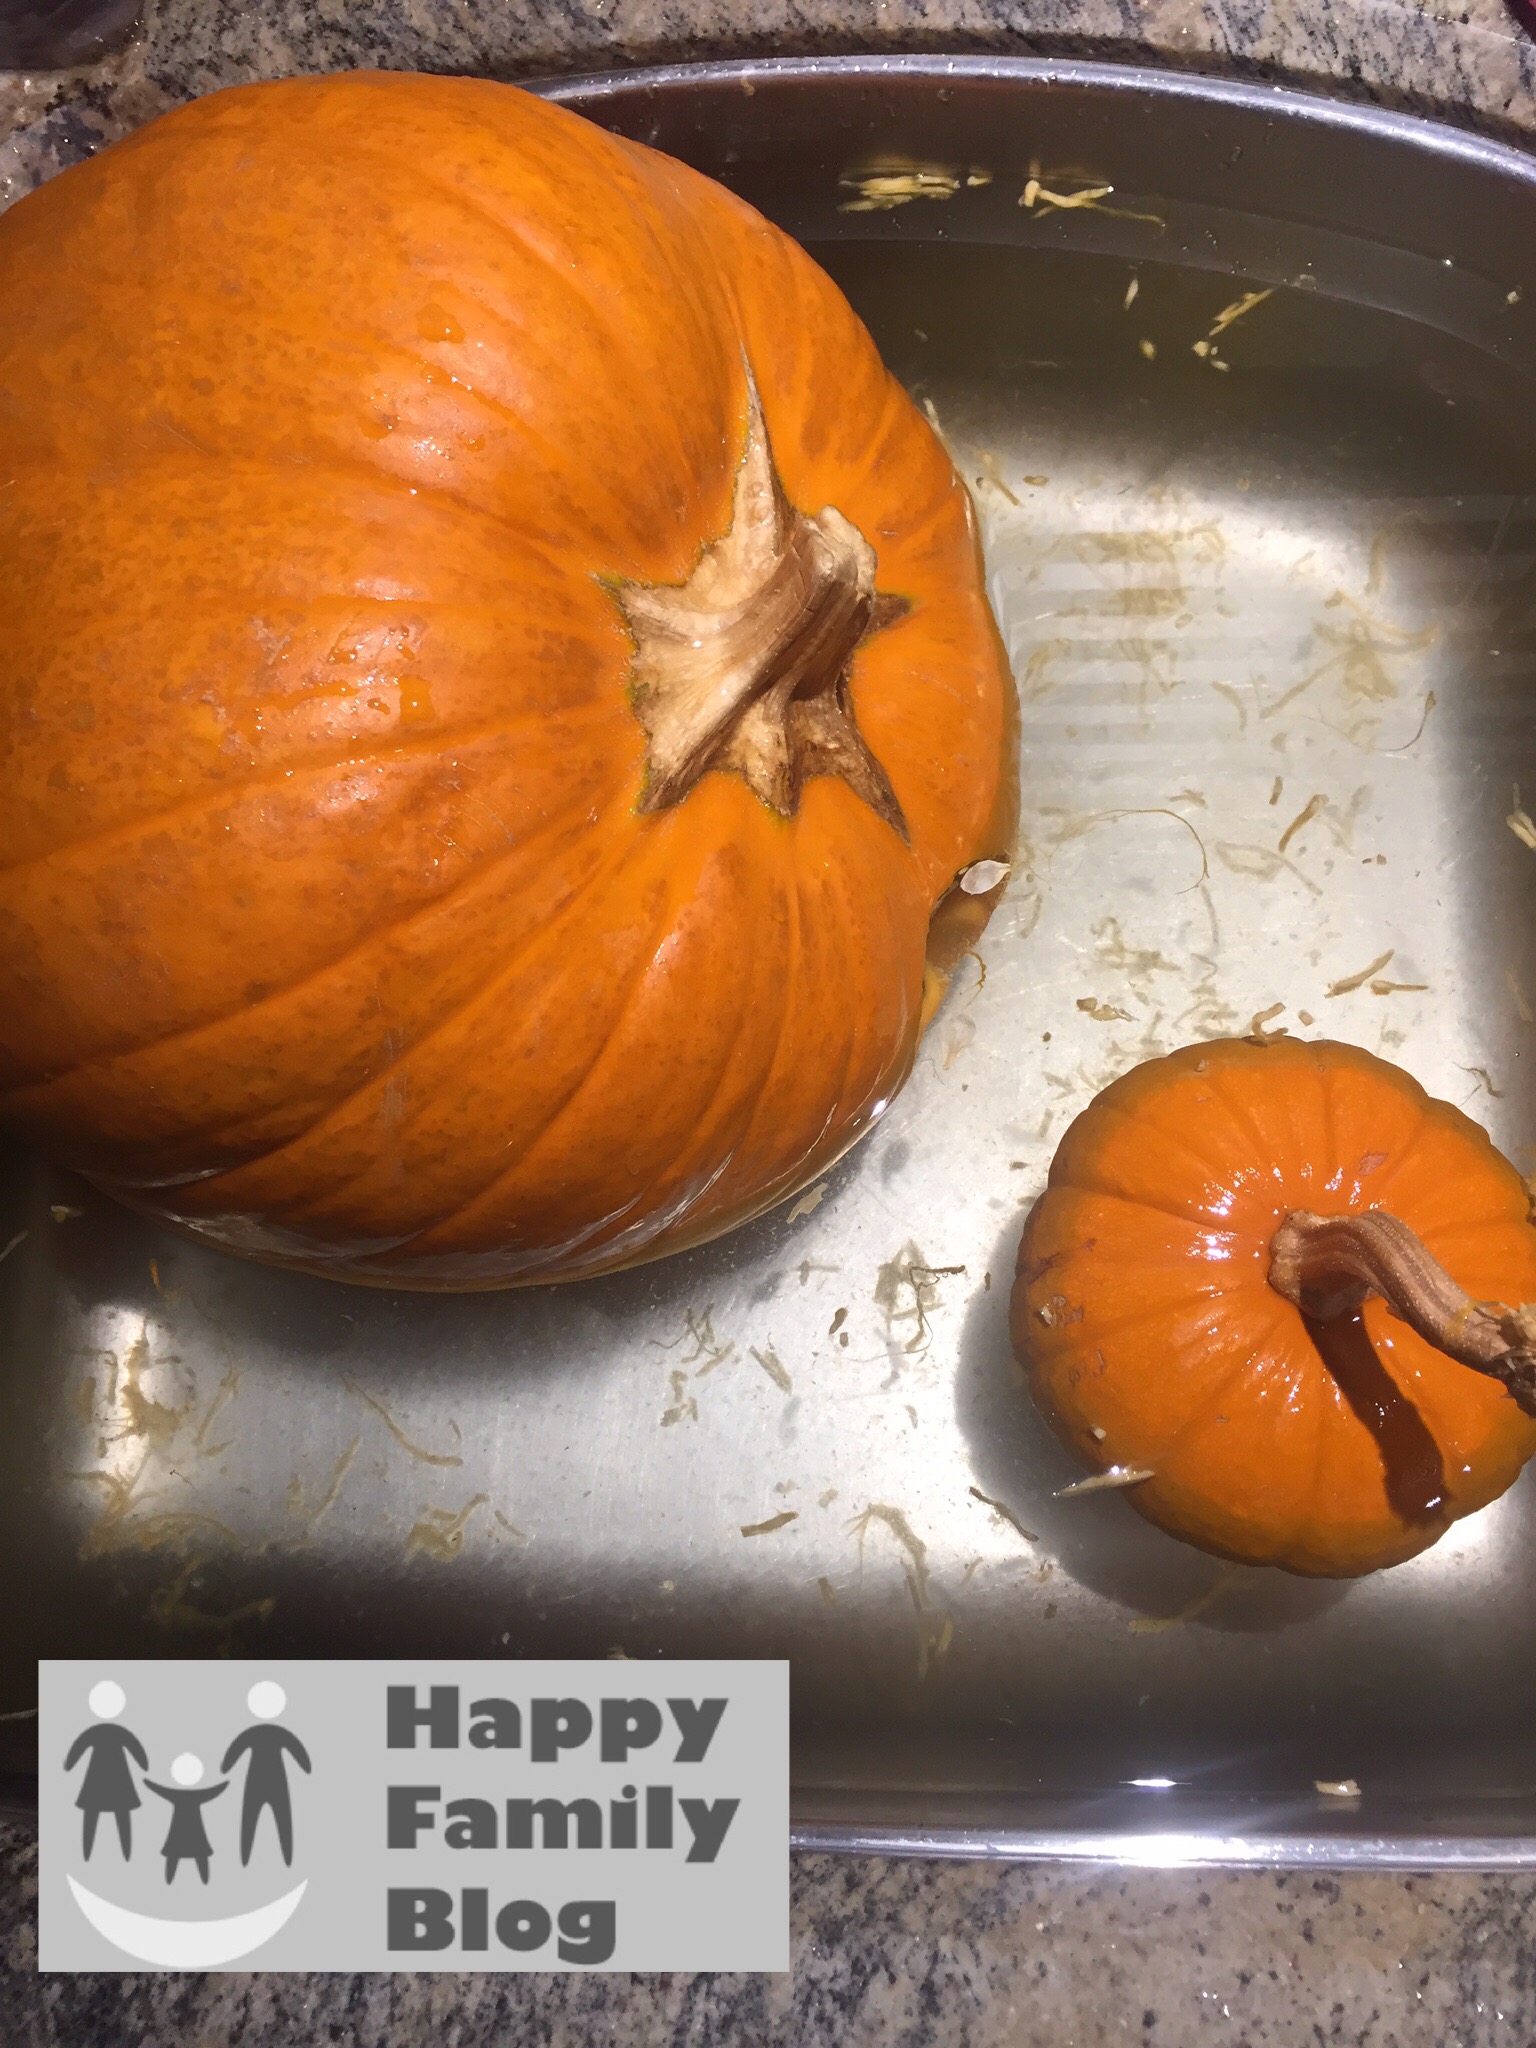
    7 - Remove the areas that were black on the template and soak the pumpkin in a mixture of vinegar and water and then add Vaseline to the cut areas to help preserve it.

    Mickey Mouse Pumpkin, Mickey Mouse Pumpkin Stencil, Mickey Mouse Pumpkin carving, Mickey Pumpkin
    8 - Place a candle inside and enjoy!
    Mickey Mouse Pumpkin, Mickey Mouse Pumpkin Stencil, Mickey Mouse Pumpkin carving, Mickey Pumpkin
    Mickey Mouse Pumpkin, Mickey Mouse Pumpkin Stencil, Mickey Mouse Pumpkin carving, Mickey Pumpkin Did you carve a pumpkin this year?   Any tips we missed?

    Looking for other things to do in South Florida this fall? Check out How to Celebrate Fall in Florida 

    FeelLooking for inspiration for other fall project?

    • DIY Pumpkin Flower Vases
    • Marbleized Floral Pumpkins
    • DIY Preppy Pumpkins

    Does your Mickey pumpkin make you crave pumpkin treats try these Pumpkin Muffins

    If you love Disney you may also want to read:

    • Birthday at Disney
    • Disney World Summer - How to Stay Cool
    • Mickey's Not So Scary Halloween

    Pin for Later: Mickey Mouse Pumpkin


    Reader Interactions

    Comments

      Leave a Reply Cancel reply

      Your email address will not be published. Required fields are marked *

      Recipe Rating


    1. _Marielli says

      October 29, 2015 at 12:31 am

      Omg love your pumpkin ?

      Reply
      • HappyFamily says

        October 29, 2015 at 8:22 am

        Thank you. I am so excited about how it turned out.

        Reply
    2. Rebecca @ AAUBlog says

      October 29, 2015 at 4:20 am

      This looks brilliant - seems straightforward too. It looks so stunning when lit

      Reply
      • HappyFamily says

        October 29, 2015 at 8:21 am

        Thank you. It was my first time carving a pumpkin and I was nervous but shocked how easy it was. Time consuming, but simple.

        Reply
    3. cindysn says

      October 29, 2015 at 7:44 am

      Love it!!! May need to try the vinegar and water soak. My pumpkin is going strong with the vaseline.

      Reply
      • HappyFamily says

        October 29, 2015 at 8:20 am

        Thank you. We are excited about how it turned out. I am a vinegar lover so it made sense to me to do the soak.

        Reply

    Primary Sidebar

    Join the Party!

    Subscribe for exclusive party inspiration, hosting tips, recipes and family fun ideas.

    • Facebook
    • Instagram
    • Pinterest
    • Twitter

    Amazon Disclosure

    We are a participant in the Amazon Services LLC Associates Program, an affiliate advertising program designed to provide a means for us to earn fees by linking to Amazon.com and affiliated sites.

    Footer

    ↑ back to top

    About

    • Privacy Policy

    Newsletter

    • Sign Up! for emails and updates

    Contact

    • Press
    • Partner

    As an Amazon Associate I earn from qualifying purchases.

    Copyright © 2023 Happy Family Blog