
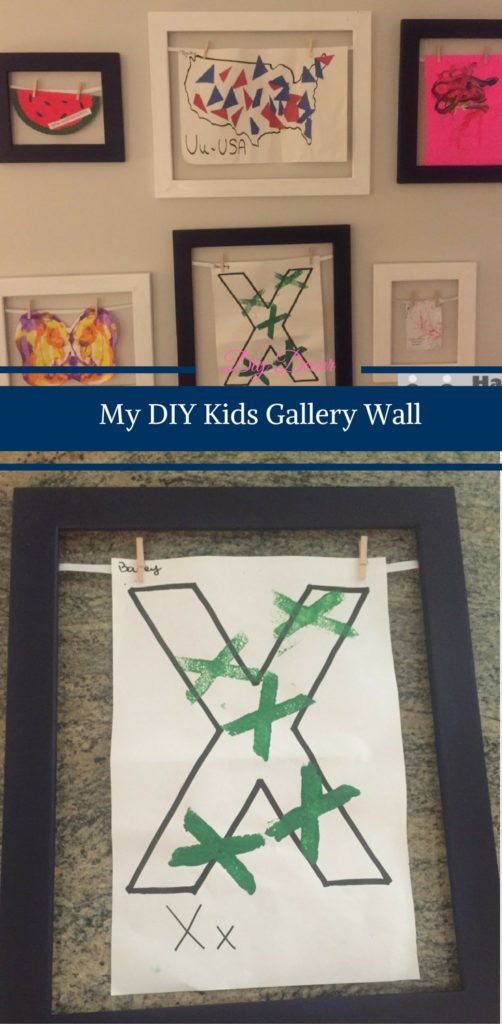
Bailey loves to craft just like her mommy. Between our home projects and school our house was overrun with beautiful works of art. I wanted to have a place where Bailey could proudly display her art, but since I wanted her to be able to change it out at least weekly I had a really hard time finding the right option. I narrowed it down to a couple and finally selected my favorite which was by Heather on The Caterpillar Years. I am so happy with the final product, DIY Kids Gallery Wall.
Supplies Needed for My DIY Kids Gallery Wall
- Frames – quantity and size depend on your wall space
- Primer and Paint - You can use spray paint or regular paint. I used regular paint because I already had it.
- Clothes Pins – I used mini crafting clothes pins
- Thin ribbon
- Flat Head Upholstery Tack Nail
- Hammer
- Scissors
- Nails
How to Create DIY Kids Gallery Wall
Step 1: Find your frames. I was hoping to find them at Goodwill, but had no luck. Instead I found these at Hobby Lobby and used a coupon. My daughter's school uses two sizes of paper for their projects so I wanted frames that would work for all her artwork.
Step 2: Prime and Paint all of the frames. I went with two different colors, but you can select one or multiple colors. Allow them to drive overnight.


Step 3: Determine the layout you want so you can determine the orientation of each frame.
Step 4: Measure and mark the height you want the ribbon to be. Keep in mind that you want enough room to easily replace the artwork, but high enough so that your art work does not hang over the frame too much.
Measure the ribbon to go across to frame and cut to the length. Attach the ribbon by pushing in the flat head upholstery tack into both sides. I tested each frame before handing them.

Step 5: Hand your frames using nails in the wall. And add the artwork and ENJOY!

Pin for Later: DIY Kids Gallery Wall
Heather @ The Caterpillar Years says
Your gallery wall turned out SO CUTE!! I love it! Thanks so much for linking to my post 😀 I hope you and your daughter get tons of use out of your gallery wall!
[email protected] says
Thank you for the idea and the feedback. This is one of our all time favorite projects!!!!
Home Improvement Kitchen says
I was recommended this blog by my cousin. I'm not sure whether this post is written by him as no one else know such detailed about my trouble. You are wonderful! Thanks!
House & Home Improvement says
I am constantly invstigating online for ideas that can assist me. Thx!
Business says
You made various fine points there. I did a search on the subject and found a good number of folks will consent with your blog.
Floor Decoration says
Keep working ,remarkable job!